
Yes, you absolutely can pop popcorn in a toaster oven! With the right technique and a few simple tools, you can achieve perfectly popped, delicious popcorn right in your toaster oven, creating a fun and easy snack experience.
Have you ever craved a warm, buttery bowl of popcorn, only to realize your stovetop or microwave isn’t available, or maybe you just want to try something a little different? Many home cooks wonder if their trusty toaster oven can handle this simple but satisfying snack. It’s a common question, and the good news is, it’s totally possible!
Don’t worry if you’ve never tried it before. This guide will walk you through everything you need to know, step-by-step. We’ll cover the best methods, what tools you’ll need, and even some tips for making your popcorn extra special. Get ready to enjoy homemade popcorn with amazing results, all thanks to your toaster oven!
Table of Contents
- Why Popcorn in a Toaster Oven?
- The Joy of a Hands-On Snack
- Toaster Oven Benefits
- Amazing Results Await
- What You’ll Need to Popcorn Perfection
- Essential Ingredients
- Essential Tools
- Method 1: The Simple Foil-Covered Pan Method
- Step-by-Step Guide
- Tips for Success with This Method
- Method 2: Using a Dedicated Popcorn Popper (if compatible)
- Understanding Compatibility
- How to Use a Compatible Popper
- Pros and Cons of Using a Dedicated Popper
- Understanding Your Toaster Oven Settings
- Common Toaster Oven Functions
- Temperature and Time Considerations
- The Science (Simplified!) Behind Popping Popcorn
- Moisture is Key
- Heat and Pressure Build-Up
- The Pop!
- Why Some Kernels Don’t Pop
- Delicious Seasoning Ideas
- Savory Delights
- Sweet Treats
- How to Season Effectively
- Frequently Asked Questions
- Q1: Is it safe to pop popcorn in aluminum foil in a toaster oven?
Why Popcorn in a Toaster Oven?
You might be picturing the classic movie theater popcorn or the quick fix from a microwave bag. But popping popcorn in a toaster oven offers some delightful advantages, especially for those who love a hands-on approach or don’t have other options readily available. It’s a fantastic alternative that proves your small appliance can do more than just toast bread and bake cookies.
The Joy of a Hands-On Snack
There’s something incredibly satisfying about actively making your own popcorn. When you pop it yourself, you’re in complete control of the ingredients. This means you can avoid the artificial butter flavorings, excessive sodium, and preservatives often found in pre-packaged microwave popcorn. You get to decide how much salt, which oils, and what seasonings go into your snack. It’s a healthier and more customizable choice!
Toaster Oven Benefits
Toaster ovens are wonderfully versatile. They’re energy-efficient for smaller tasks, heat up quickly, and are perfect for those nights when you just want a snack without heating your entire kitchen with a full-sized oven. Using a toaster oven for popcorn can be just as effective as other methods, often yielding a delightfully fluffy and evenly popped batch when done correctly. Plus, it’s a great way to make popcorn in smaller apartments or dorm rooms where larger appliances might be restricted.
Amazing Results Await
When you master the art of toaster oven popcorn, you’ll be rewarded with fluffy, perfectly popped kernels. It’s a simple pleasure that can be elevated with different seasonings. Imagine a light dusting of nutritional yeast for a cheesy flavor, smoked paprika for a hint of spice, or even a touch of cinnamon sugar for a sweet treat. Your toaster oven can help you create these delightful variations with ease.
What You’ll Need to Popcorn Perfection
Before we dive into the ‘how-to,’ let’s gather our essential ingredients and tools. Having everything ready makes the process smooth and stress-free. Think of it like setting up your creative station – the more prepared, the more fun you’ll have!
Essential Ingredients
Popcorn Kernels: This is the star of the show! Look for fresh, high-quality popping corn. You can find this in the baking aisle of most grocery stores. Varieties like yellow, white, or butterfly kernels will all work.
Oil: A bit of oil helps the kernels heat up evenly and adds flavor.
High Smoke Point Oils: Such as canola, vegetable, grapeseed, or avocado oil are excellent choices. They won’t burn easily at toaster oven temperatures.
Flavor Oils: Coconut oil adds a lovely subtle sweetness, while olive oil can impart a more robust flavor. However, be mindful of their smoke points for best results.
Salt: Fine or medium grain salt is best for sticking to the popcorn. You can also experiment with sea salt or kosher salt.
Optional Seasonings: This is where you can get creative! Think nutritional yeast, smoked paprika, garlic powder, onion powder, chili powder, cinnamon sugar, or even a sprinkle of your favorite herb blend.
Essential Tools
Toaster Oven Safe Bowl or Pan: This is crucial! You need something that can withstand the heat inside your toaster oven.
Metal Baking Sheets/Pans: A small metal baking sheet or a shallow oven-safe metal pan works wonderfully.
Glass Oven-Safe Bowls: Ensure the glass is rated for baking temperatures.
Avoid Plastic: Never use plastic bowls or containers in the toaster oven, as they can melt or release harmful fumes.
Aluminum Foil or a Toaster Oven Lid: You’ll need something to cover your bowl or pan to trap the heat and steam, which is essential for popping. Aluminum foil is a great, readily available option. Some toaster ovens come with lids for their baking pans.
Measuring Cups and Spoons: For accuracy in measuring kernels, oil, and seasonings.
Heat-Resistant Oven Mitts or Potholders: Safety first! The bowl and the toaster oven interior will be hot.
A Large Bowl or Container: For tossing the popped popcorn with seasonings before serving.
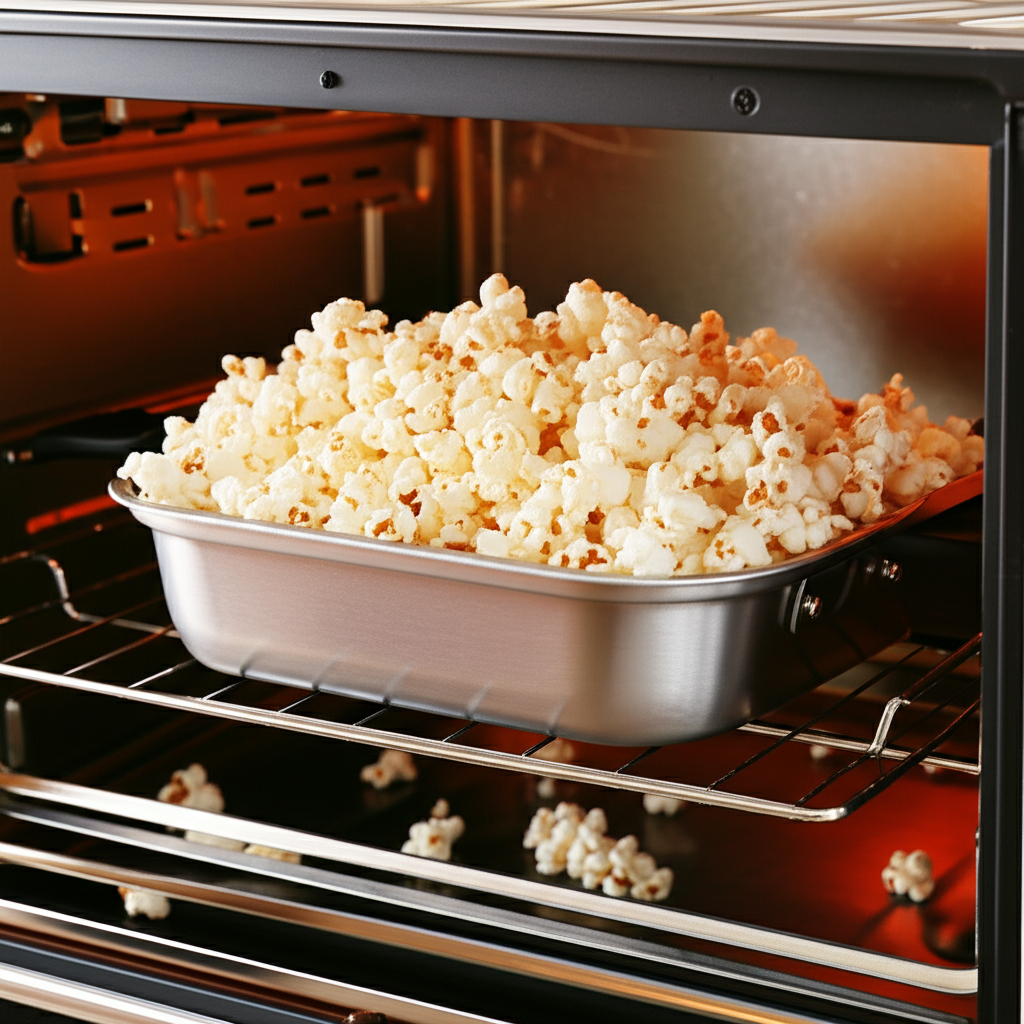
Method 1: The Simple Foil-Covered Pan Method
This is perhaps the most straightforward and effective way to pop popcorn in your toaster oven. It’s simple, requires minimal special equipment, and consistently delivers great results. Plus, cleanup is usually a breeze!
Step-by-Step Guide
1. Preheat Your Toaster Oven: Set your toaster oven to a temperature of 400°F (200°C). You want it nice and hot to get those kernels popping quickly.
2. Prepare Your Pan: Lightly grease a small, toaster oven-safe metal baking pan or shallow oven-safe dish with your chosen oil. This prevents the kernels from sticking.
3. Add Kernels and Oil:
Pour about 1/4 cup of popcorn kernels into the oiled pan.
Drizzle 1 to 2 teaspoons of your cooking oil over the kernels.
Give the pan a gentle shake to coat the kernels evenly. You can also add a tiny pinch of salt at this stage if you like, though adding it after popping is usually best for even distribution.
4. Cover Tightly: This is a critical step! Tightly cover the pan with aluminum foil, creating a sealed packet. Make sure there are no gaps where heat or steam can escape. If you have a toaster oven lid that fits your pan, that will work too.
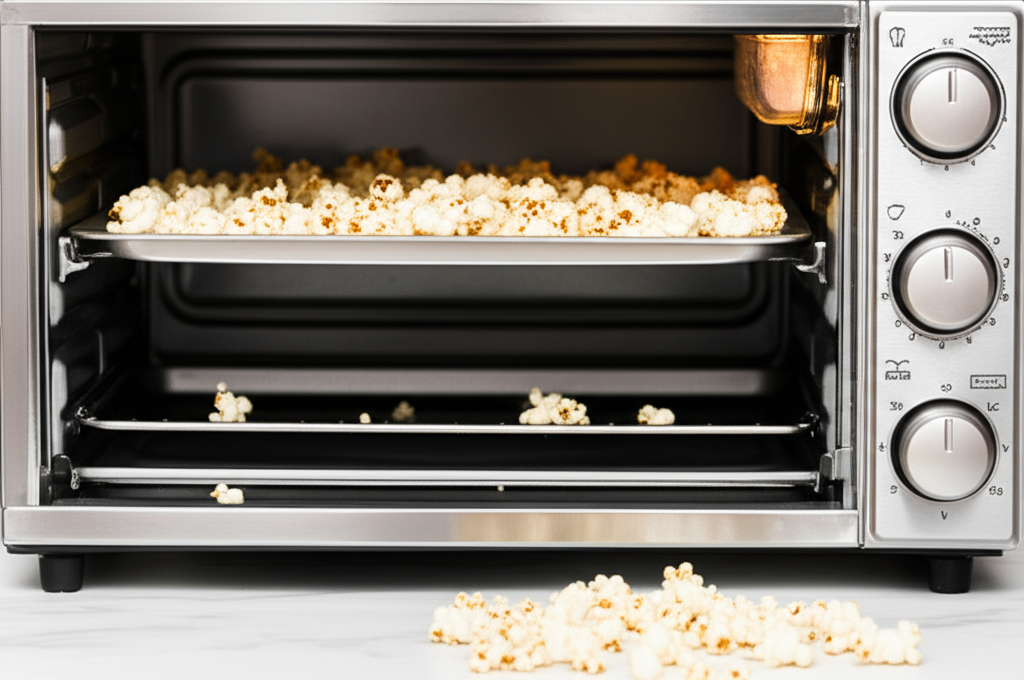
5. Pop Away! Carefully place the covered pan onto the toaster oven rack. Set your toaster oven timer for about 5-10 minutes. You’ll start hearing popping noises within a few minutes.
Listen Carefully: The popping will start slowly, then become rapid. Once the popping slows down to about one pop every 2-3 seconds, it’s time to remove the pan. Don’t wait too long, or you’ll risk burning the popcorn at the bottom.
6. Careful Removal: Using your heat-resistant oven mitts, carefully slide the rack out of the toaster oven and remove the pan. Be very cautious of the hot steam that will escape when you uncover it.
7. Season and Enjoy: Transfer the popped popcorn to a large bowl. Drizzle with a little melted butter or oil if desired, and sprinkle with your favorite salt and seasonings. Toss gently to coat evenly.
Tips for Success with This Method
Don’t Overcrowd: Use the recommended amount of kernels. Too many will prevent even heat distribution, leading to unpopped kernels or burnt popcorn.
Listen for the Pop: Your ears are your best guide here. The sound of the popping is the most reliable indicator of when it’s done.
Shake It Up: During the popping process, you can carefully pull the rack out slightly (while wearing oven mitts!) and give the pan a gentle shake every few minutes to help redistribute the kernels and ensure even popping.
Check for Unpopped Kernels: After transferring the popped corn, you might find a few unpopped kernels. You can pick these out or, if you’re feeling adventurous, carefully put them back in for another short blast of heat (watch them closely!).
Method 2: Using a Dedicated Popcorn Popper (if compatible)
Some countertop popcorn poppers are designed to be used with toaster ovens, or at least their components are safe to use. If you have a specific popcorn popper designed for home use, it’s worth checking its compatibility with toaster ovens. Always refer to your appliance’s manual first.
Understanding Compatibility
Not all popcorn poppers are created equal, and not all are designed for the intense heat of a toaster oven. Some poppers are specifically built for stovetops, while others are for microwaves. However, a few innovative designs might work.
Toaster Oven Specific Poppers: You can find specialized popcorn poppers designed to sit on the rack of a toaster oven. These often have vents and specific materials to ensure even heating and safe operation.
Stovetop Popper Compatibility: If you have a stovetop popcorn popper (the kind with a crank handle), you might be able to use it in a toaster oven if it’s entirely metal and sits flat on the rack. However, this is where caution is strongly advised. The handle might interfere with the oven door or heating elements, and some crank mechanisms might not function well with the concentrated heat. Always check your popper’s manual to see if toaster oven use is approved.
How to Use a Compatible Popper
If your popcorn popper is confirmed to be toaster oven safe:
1. Consult Your Manual: Seriously, read what the manufacturer says. This is the most important step for safety and ensuring your popcorn popper isn’t damaged.
2. Preheat: Follow the popcorn popper’s instructions for oil and kernel amounts. Some poppers have built-in oil reservoirs or recommend a specific type and amount of oil.
3. Place in Toaster Oven: Position the Popper on the toaster oven rack according to its design. Ensure it’s stable and not touching any heating elements or the sides of the oven.
4. Set Temperature and Time: This will vary greatly depending on the popper and your toaster oven. A common starting point would be around 375°F to 400°F (190°C to 200°C). You’ll likely need to experiment. Start with a shorter time (e.g., 5-7 minutes) and listen for the popping.
5. Monitor Closely: As with the foil method, listen for the popping to slow down. You may need to turn the crank (if applicable) periodically, again, checking your manual for specific instructions.
6. Remove and Serve: Use oven mitts to carefully remove the popper. Be mindful of steam and hot oil. Empty the popcorn into a serving bowl and season as desired.
Pros and Cons of Using a Dedicated Popper
| Pros | Cons |
| :—————————————– | :———————————————————————– |
| Designed for popcorn, specific results. | May not be compatible with all toaster ovens or popper models. |
| Can offer more consistent popping if designed for it. | Requires an additional purchase if you don’t already own one. |
| Often easier to clean than foil method. | Can be more expensive than the simple foil pan method. |
| May have built-in features for oil/seasoning. | Potential for damage to the popper or toaster oven if not used correctly. |
Always prioritize safety and manufacturer instructions when using specialized equipment in your toaster oven.
Understanding Your Toaster Oven Settings
Toaster ovens can feel a bit mysterious if you’re not used to them. Knowing what these settings mean and how to use them can make a big difference in your cooking success, including popcorn popping!
Common Toaster Oven Functions
Most toaster ovens have a few core functions that are useful for more than just toasting bread.
Toast: This is the classic setting, primarily for browning bread. It typically uses both top and bottom heating elements.
Bake: Similar to a conventional oven, this setting usually uses both top and bottom heating elements to cook food evenly. This is the setting we’ll primarily use for popcorn.
Broil: This setting uses only the top heating element(s) at a high intensity. While great for browning the tops of dishes, it’s generally not recommended for popping popcorn as it can quickly scorch the kernels before they have a chance to pop.
Convection (if available): If your toaster oven has a convection fan, it circulates hot air within the oven. This can speed up cooking and promote even browning. For popcorn, it can be beneficial as it helps circulate heat around the kernels. If using convection, you might need to slightly lower the temperature or the cooking time.
Temperature and Time Considerations
Temperature: For popping popcorn, a moderate to high temperature is best, typically between 375°F and 425°F (190°C – 220°C). The 400°F (200°C) mark is a great starting point for the foil method. Too low, and you’ll have unpopped kernels; too high, and you risk burning.
Time: This is highly variable. It depends on your toaster oven’s power, the amount of popcorn, the chosen method, and even the freshness of your kernels. Always rely on sound and visual cues rather than just the clock. A general guideline is 5-10 minutes, but you must listen for the popping to subside.
Rack Position: For most toaster ovens, placing the pan in the middle of the oven provides the most even heat distribution. Avoid placing it too close to the top or bottom heating elements.
The Science (Simplified!) Behind Popping Popcorn
Ever wondered why popcorn pops? It’s a fascinating bit of kitchen science that’s easy to understand and makes the whole process more enjoyable.
Moisture is Key
Popcorn kernels aren’t just hard little seeds; they contain a tiny bit of water inside, trapped within a hard outer shell called the pericarp. This shell is crucial because it acts like a pressure cooker.
Heat and Pressure Build-Up
When you heat the kernel, the moisture inside turns into steam. As the temperature rises, the steam builds up pressure. The hard pericarp contains this pressure until it reaches a critical point.
The Pop!
At around 300-340°F (150-170°C), the internal pressure from the steam becomes too much for the pericarp to hold. It ruptures, and the superheated steam and starch inside rapidly expand. This rapid expansion is the “pop!” The starch then cools and solidifies into the fluffy, white interior we know and love.
Why Some Kernels Don’t Pop
Insufficient Moisture: If there isn’t enough water inside, the steam pressure won’t build up enough to rupture the shell. This can happen with older kernels or kernels that have been stored improperly in dry conditions.
Cracked Pericarp: If the outer shell is damaged, the steam can escape too early, preventing the kernel from reaching the necessary pressure to pop.
Improper Heating: Uneven or insufficient heat won’t allow the internal moisture to reach the popping temperature and pressure point.
Understanding this helps explain why using enough oil, covering the pan tightly to trap steam, and heating to the correct temperature are so important for successful toaster oven popcorn.
Delicious Seasoning Ideas
Once your popcorn is perfectly popped, the fun really begins! Plain popcorn is great, but a little seasoning can transform it into something truly special. Here are some ideas to get your creativity flowing:
Savory Delights
Classic Butter & Salt: Melted butter (or a dairy-free alternative) with fine sea salt. A timeless favorite.
Cheesy Goodness: Sprinkle with nutritional yeast for a dairy-free cheesy flavor, or grate some Parmesan cheese over it while it’s still warm.
Spicy Kick: Mix chili powder, cumin, and a pinch of cayenne pepper. Add a squeeze of lime juice for a refreshing twist.
Herby Delight: Finely chopped fresh rosemary or thyme, mixed with garlic powder and a touch of salt.
Smoky Barbecue: A blend of smoked paprika, garlic powder, onion powder, and a pinch of brown sugar.
Everything Bagel: A sprinkle of everything bagel seasoning offers a delicious mix of sesame seeds, poppy seeds, garlic, onion, and salt.
Sweet Treats
Cinnamon Sugar: A simple and comforting mix of granulated sugar and cinnamon, tossed while the popcorn is warm.
Cocoa Powder & Sugar: For a chocolatey popcorn, mix unsweetened cocoa powder with powdered sugar and a pinch of salt.
* Maple Pecan: Drizzle with a little maple syrup and sprinkle with chopped toasted pecans for a decadent treat.
How to Season Effectively
1. Use a Big Bowl: Transfer your popped popcorn to the largest bowl you have. This gives you room to toss everything around without making a mess.
2. Melt Butter First (Optional): If using butter, melt it in a small saucepan or microwave-safe bowl.
3. Seasoning Mix: If you’re using a dry spice blend, mix it together in a small bowl first.
4. Drizzle and Sprinkle: Drizzle melted butter or oil evenly over the popcorn. Then, sprinkle your salt and seasonings over the top.
5. Toss Gently: Use your hands (carefully, if still warm!) or two large spoons to gently toss the popcorn. You want to coat as much of it as possible without crushing the fluffy pieces.
6. Taste and Adjust: Taste a piece and add more salt or seasonings if needed.
Frequently Asked Questions
Q1: Is it safe to pop popcorn in aluminum foil in a toaster oven?
A1: Yes, it is generally safe, provided you use heavy-duty foil and ensure it’s tightly sealed around the edges of your oven-safe dish. The foil acts as a lid to trap heat and steam